Table of Contents
ToggleGum stuck to baseboards and trim is one of those household headaches that seems minor until you’re on your hands and knees trying to scrape hardened residue off painted wood. Whether it’s from kids, pets brushing against discarded gum, or an unfortunate accident, gum leaves behind sticky residue and discoloration that regular cleaning won’t touch. This guide walks through proven methods for removing gum from baseboards and trim without damaging the finish, using tools and techniques that work for both fresh gum and months-old buildup.
Key Takeaways
- The freezing method is the gentlest first approach to removing gum buildup from baseboards—apply ice for 3–5 minutes, scrape with a plastic putty knife, then use isopropyl alcohol for residue.
- Deep cleaning gums from textured trim or stubborn, weeks-old residue requires a heat gun on low (around 200°F) followed by solvent treatment and a toothbrush for grooves.
- Always avoid metal scrapers and steel wool on painted trim; use plastic putty knives and soft-bristle tools to prevent scratching and damaging the finish.
- Seal baseboards with semi-gloss latex paint or apply polyurethane to stained wood to create a harder, more washable surface that resists future gum damage.
- Establish preventive habits like placing trash cans in high-traffic areas, maintaining monthly cleaning with a damp cloth, and touching up any scraped paint immediately to avoid permanent marks.
What Is Gum Buildup on Baseboards and Trim?
Gum buildup occurs when chewing gum adheres to baseboards, door casings, window trim, or other painted or stained woodwork. The polymers in gum bond to porous surfaces, and over time, dirt and oils embed into the residue, creating a dark, sticky patch that’s tough to remove with soap and water alone.
Most baseboards are either MDF (medium-density fiberboard) or solid pine, finished with latex or oil-based paint. Trim might also be stained hardwood or primed finger-jointed pine. The finish matters because aggressive scraping or harsh solvents can strip paint, dull stain, or gouge soft MDF. Gum removal requires balancing enough force or chemical action to break the adhesive bond without damaging the substrate.
Fresh gum is pliable and can sometimes be peeled off in one piece. Older gum hardens, flattens, and works its way into the wood grain or paint texture, making removal more labor-intensive. The longer gum sits, the more it oxidizes and darkens, leaving a stain even after the bulk is removed. Addressing gum as soon as it’s discovered saves time and reduces the risk of permanent marks.
Essential Tools and Supplies for Deep Cleaning Gum Residue
Gather the following before starting. Having everything on hand prevents multiple trips to the hardware store mid-project.
Tools:
- Plastic putty knife or old credit card – For scraping without scratching paint
- Microfiber cloths – Lint-free and absorbent for wiping solvents
- Ice pack or freezer bag with ice – For freezing method
- Heat gun or hair dryer – For softening stubborn gum (heat gun preferred for faster results)
- Soft-bristle toothbrush – For scrubbing textured surfaces
- Rubber gloves – Protects hands from solvents
Cleaning Agents:
- Goo Gone or citrus-based adhesive remover – Breaks down gum polymers without harsh fumes
- Isopropyl alcohol (70% or 90%) – Effective on residue and safe for most paints
- WD-40 – Penetrates and lifts gum: needs thorough cleanup afterward
- Dish soap (Dawn or similar degreaser) – For final cleaning
- White vinegar – Mild acid for residue and odor neutralization
Safety Gear:
- Nitrile or latex gloves – Especially when using solvents
- Safety glasses – If using a heat gun at close range
- Ventilation – Open windows when using petroleum-based products
Avoid metal scrapers, steel wool, or abrasive pads on painted trim. They’ll scratch the finish and create more work. For heavily textured baseboards or beadboard, a toothbrush and solvent work better than scraping alone.
Step-by-Step Guide to Removing Gum from Baseboards
Start with the gentlest method and escalate only if needed. Most gum comes off with freezing or heat, followed by solvent for residue.
Freezing Method for Stubborn Gum Removal
Freezing hardens gum to the point where it becomes brittle and easier to chip off without smearing.
- Apply ice directly to the gum. Use an ice pack, sealed freezer bag filled with ice, or even a can of compressed air held upside down (releases freezing propellant). Hold for 3–5 minutes until the gum feels rock-hard.
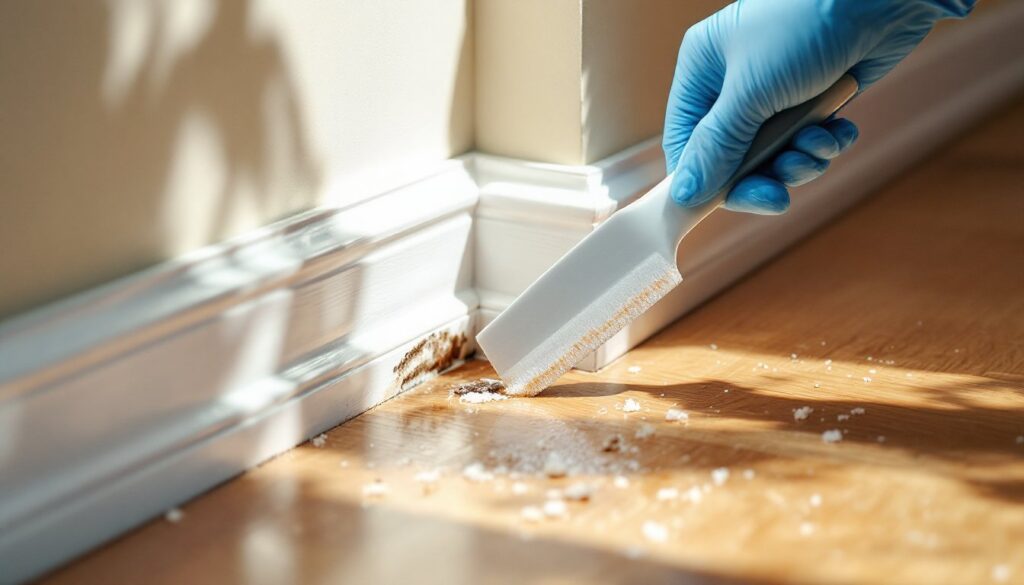
- Scrape with a plastic putty knife. Work from the edges toward the center, using short, controlled strokes. The gum should fracture and lift in chunks. If it starts to soften and smear, reapply ice.
- Remove remaining residue. Once the bulk is off, a sticky film often remains. Dampen a microfiber cloth with isopropyl alcohol or Goo Gone and rub in small circles. Let the solvent sit for 30 seconds to break down the adhesive, then wipe clean.
- Final wash. Mix a few drops of dish soap in warm water, wipe the area, then dry with a clean cloth. This removes any solvent residue and restores the finish’s shine.
The freezing method works best on painted surfaces and avoids heat exposure, which can soften paint or loosen caulk seams. For cleaning ideas that tackle other stubborn messes, many homeowners find solvent-free approaches equally effective.
Heat and Solvent Techniques for Deep-Set Residue
When gum has been ground into textured trim or has sat for weeks, heat softens it enough to scrape without chipping paint.
- Set a heat gun to low (around 200°F) or use a hair dryer on high. Hold 4–6 inches from the gum and move in slow circles for 20–30 seconds. The gum will soften and become pliable.
- Scrape immediately while warm. Use a plastic scraper and work quickly, gum re-hardens as it cools. If it starts to smear, apply more heat. Don’t overheat: prolonged exposure can blister paint or scorch wood.
- Apply a solvent for residue. WD-40 penetrates deep-set gum. Spray a small amount on the area, let it sit for 1 minute, then scrub with a soft-bristle toothbrush. Wipe with a microfiber cloth. Follow with isopropyl alcohol to remove the oily film WD-40 leaves behind.
- Neutralize and clean. Wipe the area with a cloth dampened in white vinegar to neutralize any solvent odor, then wash with soapy water and dry.
For gum embedded in grooves or beadboard detail, a toothbrush dipped in Goo Gone works better than scraping. Let the solvent do the work. Homes focused on organization and cleaning hacks often recommend citrus-based removers for their low toxicity and pleasant scent.
Safety note: Heat guns can reach 1,000°F on high settings. Always use the lowest effective temperature and keep the nozzle moving. Never aim at one spot for more than a few seconds.
Protecting Your Trim: Preventing Future Gum Damage
Once baseboards are clean, a few preventive steps reduce the chance of repeat incidents.
Seal and protect the finish. If baseboards are painted, a coat of semi-gloss or satin latex paint provides a harder, more washable surface than flat paint. Semi-gloss resists staining and wipes clean more easily. For stained wood trim, apply a coat of polyurethane (water-based for low odor, oil-based for durability). This seals the wood and prevents gum polymers from penetrating the grain.
Establish gum disposal habits. Place small trash cans in high-traffic areas, mudrooms, kids’ rooms, playrooms, so gum has a designated spot. If young children are in the home, consider a no-gum rule until they’re old enough to dispose of it properly.
Regular maintenance cleaning. Wipe baseboards monthly with a damp microfiber cloth and mild cleaner. This removes dust, oils, and any fresh gum before it hardens. Many home improvement how-tos emphasize that routine cleaning prevents buildup that requires aggressive intervention later.
Touch up damaged areas. If scraping removed paint or left a dull spot, lightly sand with 220-grit sandpaper, prime with a stain-blocking primer (if needed), and touch up with matching paint. Keep a small jar of trim paint on hand for quick repairs. For deep gouges in MDF, fill with spackling compound, sand smooth, and repaint.
Consider trim guards in high-impact zones. In areas where baseboards take frequent abuse, entryways, hallways, behind doors, vinyl or rubber baseboard guards absorb impact and are easier to replace than repainting or refinishing wood trim. They’re not aesthetically elegant, but they’re practical for homes with active kids or pets.
Conclusion
Removing gum from baseboards and trim doesn’t require expensive products or professional help, just patience and the right technique. Freezing works for most situations, heat tackles deep-set residue, and solvents handle the sticky aftermath. Protect your work with a durable finish and establish habits that keep gum off woodwork in the first place. With clean, restored trim, the details that frame a room look sharp again.